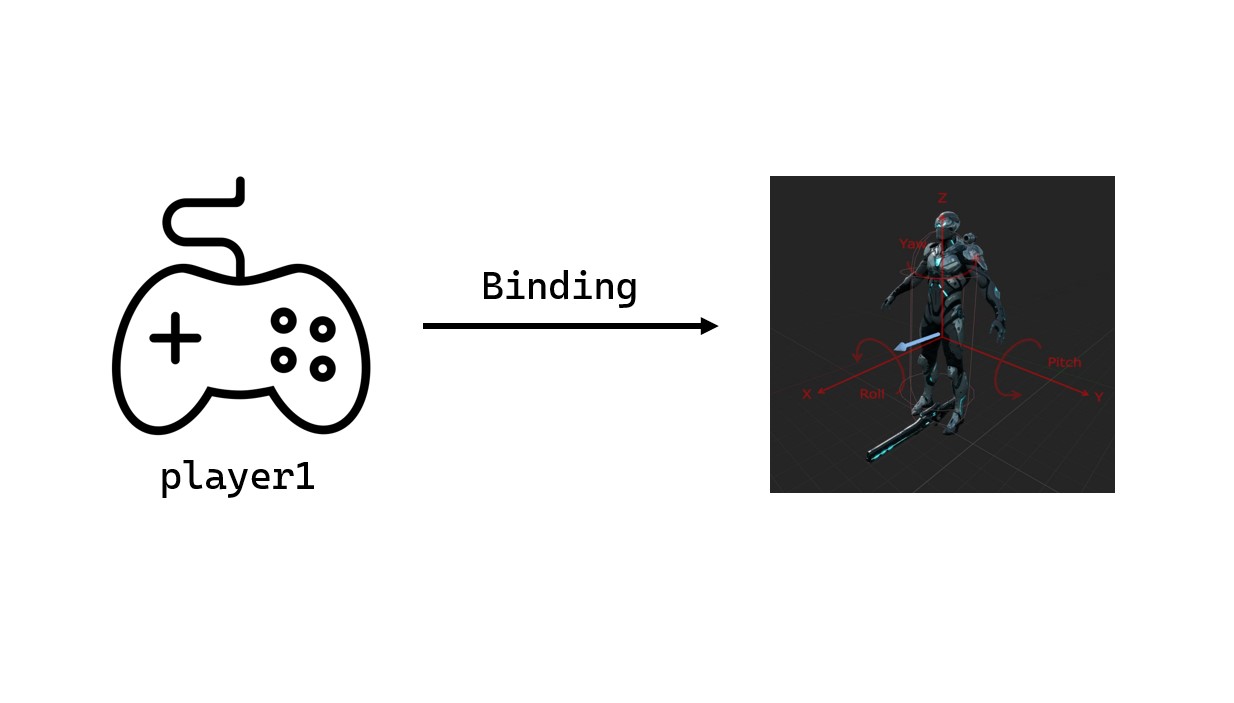
언리얼 엔진은 캐릭터의 움직임을 1인칭으로 구현할수있고, Camera-SpringArm과같은 툴을 이용해 3인칭 형식으로 구현할수있다.
바인딩은 GTA나 3인칭 슈팅게임등 FPS게임에서 필수로 쓰이므로 꼭 알아두어야 하는 개념이다.
WASD 움직임 구현하기
우선 에디터내에서 키값을 세팅해주어야하는데, Edit - ProjectSettings - Input - Bindings 에 들어가면 키셋팅을 할 수있다.
MoveForward는 W, S, MoveRight는 A, D 방향키를 담당.
Scale은 1.0 단위로 설정하는데, 이값은 각 함수의 매개변수인 AxisValue값에 대응된다

[헤더파일 선언]
헤더파일에는 MoveForward, MoveRight 함수를 선언한다.
SetupPlayerInputComponent는 언리얼에서 c++파일생성시 public에 나타나는데, 사용자 입력을 받는함수다. UInputComponent클래스의 인스턴스를 매개변수로 받는다.
// public
virtual void SetupPlayerInputComponent(class UInputComponent* PlayerInputComponent) override;
// private
void MoveForward(float AxisValue);
void MoveRight(float AxisValue);
[Cpp파일 선언]
AddMovementInput : 액터 위치 업데이트
GetActorForwardVector() : 엑터가 향하는 방향기준 x축 상의 좌표를 벡터로 반환
GetActorActorRightVector() : 엑터가 향하는 방향기준 y축 상의 좌표를 벡터로 반환
사용자가 키보드를 입력할대, BindAxis로 바인딩처리가 되고, MoveForward, MoveRight함수의 이벤트가 발생해서 캐릭터를 움직이게 할 수 있다.
// SetupPlayerInputComponent
PlayerInputComponent->BindAxis(TEXT("MoveFoward"), this, &AShooterCharacter::MoveForward);
PlayerInputComponent->BindAxis(TEXT("MoveRight"), this, &AShooterCharacter::MoveRight);
void AShooterCharacter::MoveForward(float AxisValue)
{
AddMovementInput(GetActorForwardVector() * AxisValue);
}
void AShooterCharacter::MoveRight(float AxisValue)
{
AddMovementInput(GetActorRightVector() * AxisValue);
}
마우스로 화면 전환하기
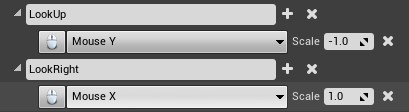
먼저 아까와같이 에디터상에서 마우스Y와 마우스X를 세팅해주도록 한다. 스케일은 1.0으로 동일하게 설정한다.
[Cpp파일 선언]
방향키는 사용자가 직접 함수로 정의해야하는데, 마우스컨트롤러는 APawn의 멤버함수들을 이용해 손쉽게 움직음을 구현할 수 있다. SetupPlayerInputComponent함수 내에서 바인딩을 정의한다.
AddControllerPitchInput, AddControllerYawInput은 APawn의 멤버함수로써, 각각 Value값이 들어오면 pitch와 Yaw를 컨트롤 할 수 있게끔한다.
// SetupPlayerInputComponent
PlayerInputComponent->BindAxis(TEXT("LookUp"), this, &APawn::AddControllerPitchInput);
PlayerInputComponent->BindAxis(TEXT("LookRight"), this, &APawn::AddControllerYawInput);
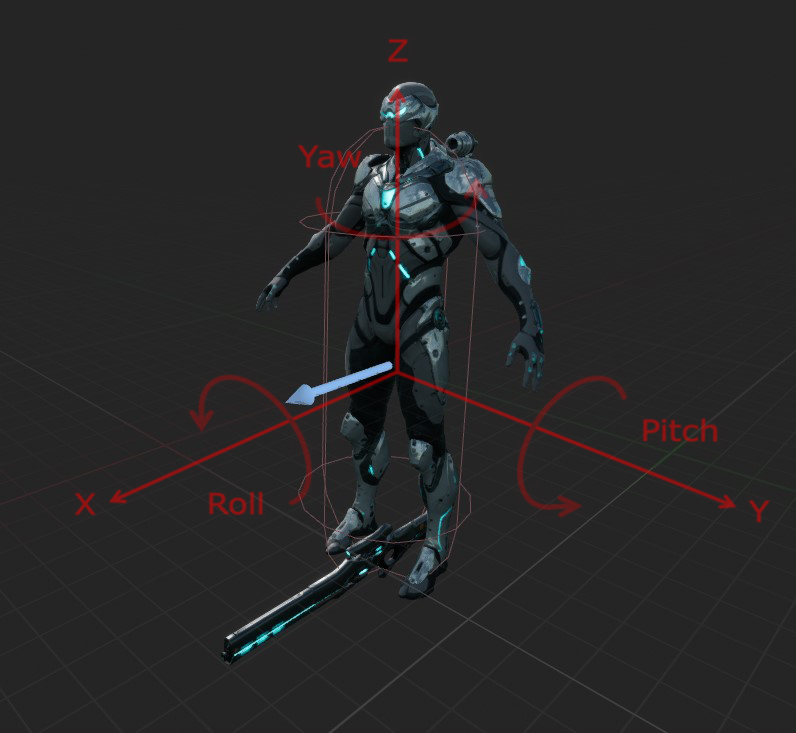
컴파일을 진행하면 마우스가 움직임에 따라 화면이 전환되는것을 확인할 수 있다.
(왼쪽 그림과 같이 캐릭터가 X축을 바라본다고 가정했을때 Mouse Y는 Pitch에 대응되고, MouseX는 Yaw에 대응된다.)
BindAxis에 관한 설명은 아래 링크에서 확인 가능하다.
[언리얼 엔진] PlayerInput, BindAxis 움직임 구현
tank.h #pragma once #include "CoreMinimal.h" #include "Tank.generated.h" UCLASS() class TOONTANKS_API ATank : public ABasePawn { GENERATED_BODY() public: // Called to bind functionality to input vir..
artsung410.tistory.com
점프 구현하기
BindAxis와는 다르게 점프기능은 Action으로 간주해서, 에디터상에서 BindAxis 대신 BindAction으로 정의해야한다.

[cpp파일 선언]
마우스컨트롤러와 비슷하게, ACharacter멤버함수인 Jump를 이용해서 캐릭터의 Value값을 받아 점프를 구현할 수 있다.
마찬가지로 SetupPlayerInputComponent함수 내에서 바인딩을 정의한다.
// SetupPlayerInputComponent
PlayerInputComponent->BindAction(TEXT("Jump"), EInputEvent::IE_Pressed, this, &ACharacter::Jump);

총정리
[헤더파일 선언]
// Fill out your copyright notice in the Description page of Project Settings.

#pragma once

#include "CoreMinimal.h"
#include "GameFramework/Character.h"
#include "MyCharacter.generated.h"

UCLASS()
class SIMPLESHOOTER_API AMyCharacter : public ACharacter
{
	GENERATED_BODY()

public:
	// Sets default values for this character's properties
	AMyCharacter();

protected:
	// Called when the game starts or when spawned
	virtual void BeginPlay() override;

public:
	// Called every frame
	virtual void Tick(float DeltaTime) override;

	// Called to bind functionality to input
	virtual void SetupPlayerInputComponent(class UInputComponent* PlayerInputComponent) override;

private:
	void MoveForward(float AxisValue);
	void MoveRight(float AxisValue);
	// void LookUp(float AxisValue);
};
[cpp파일 선언]
// Fill out your copyright notice in the Description page of Project Settings.


#include "MyCharacter.h"

// Sets default values
AMyCharacter::AMyCharacter()
{
 	// Set this character to call Tick() every frame.  You can turn this off to improve performance if you don't need it.
	PrimaryActorTick.bCanEverTick = true;

}

// Called when the game starts or when spawned
void AMyCharacter::BeginPlay()
{
	Super::BeginPlay();

}

// Called every frame
void AMyCharacter::Tick(float DeltaTime)
{
	Super::Tick(DeltaTime);

}

// Called to bind functionality to input
void AMyCharacter::SetupPlayerInputComponent(UInputComponent* PlayerInputComponent)
{
	Super::SetupPlayerInputComponent(PlayerInputComponent);

	// BindAction 점프나 위아래 보는동작
	PlayerInputComponent->BindAxis(TEXT("MoveFoward"), this, &AMyCharacter::MoveForward); // 사용자 정의
	PlayerInputComponent->BindAxis(TEXT("MoveRight"), this, &AMyCharacter::MoveRight); // 사용자 정의
	PlayerInputComponent->BindAxis(TEXT("LookUp"), this, &APawn::AddControllerPitchInput); //마우스 컨트롤은 Apawn
	PlayerInputComponent->BindAxis(TEXT("LookRight"), this, &APawn::AddControllerYawInput); //Apawn
	PlayerInputComponent->BindAction(TEXT("Jump"), EInputEvent::IE_Pressed, this, &ACharacter::Jump); // 점프기능은 Acharacter
}

void AMyCharacter::MoveForward(float AxisValue)
{
	AddMovementInput(GetActorForwardVector() * AxisValue);
}

void AMyCharacter::MoveRight(float AxisValue)
{
	AddMovementInput(GetActorRightVector() * AxisValue);
}
'Programming > C | C++ | Unreal' 카테고리의 다른 글
| [C++] 데이터 타입 / 변수 / 표기법 (0) | 2022.04.06 |
|---|---|
| [C++] 자료형 (0) | 2022.04.05 |
| [언리얼 엔진] Actor 회전시키기 (사용자 입력, AI 회전구현) (0) | 2022.02.28 |
| [언리얼 엔진] PlayerInput, BindAxis 움직임 구현 (0) | 2022.02.27 |
| [C++] 자료구조 - 선형리스트(Linear List) / vector 클래스 기능 정리 (0) | 2022.02.17 |