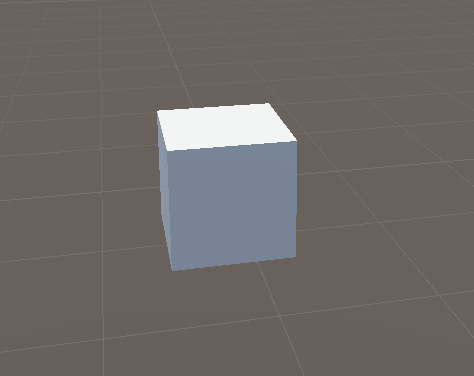
파이썬에서 입력된 데이터를 유니티로 보내서 씬화면에 있는 큐브의 위치를 변경시켜보자.
서버 연결방식은 루프백 통신방식을 사용한다.
unity는 python(클라이언트)의 연결을 기다리는 서버, python은 unity와 연결을 설정하는 클라이언트의 역할을 담당하도록 구조를 짠다. 연결이 설정되면 python은 좌표 또는 바이트스타입의 데이터를 unity로 보낼 수 있다.
unity는 python에서 데이터를 수신하고 수신된 좌표를 기반으로 큐브의 위치를 업데이트한다.
Thread thread;
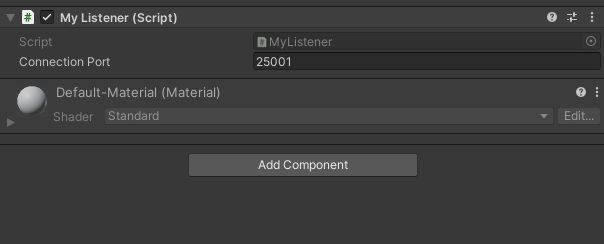
public int connectionPort = 25001;
TcpListener server;
TcpClient client;
bool running;Thread : 역할은 메인쓰레드에서 서버를 담당하는것이 아닌, 서버전용 쓰레드를 생성하는 역할을 담당한다.
따라서 유니티를 실행하지 않은상태에서도 데이터를 수신할 수 있다.
connectionPort : 클라이언트가 접속할 포트번호.
TcpListener : 네트워크 클라이언트에서 연결을 수신한다.
TcpClient : 네트워크를 통해 스트림 데이터를 연결, 전송, 수신등 간단한 기능들을 제공한다.
running : 서버가 열려있는지 체크한다.
    private void Start()
    {
        // Receive on a separate thread so Unity doesn't freeze waiting for data
        ThreadStart ts = new ThreadStart(GetData);
        thread = new Thread(ts);
        thread.Start();
    }
메서드를 별도의 스레드에서 실행하도록 한다.
    void GetData()
    {
        // Create the server
        // 클라이언트 연결.
        server = new TcpListener(IPAddress.Any, connectionPort);
        server.Start();

        // Create a Clinent to get the data stream
        client = server.AcceptTcpClient();

        // Start listening
        running = true;
        while(running)
        {
            Connection();
        }
        server.Stop();
        Debug.Log("서버 스탑");
    }
GetData의 메서드는 서버를 생성해 클라이언트의 데이터를 수신받는 역할을 한다.
IPAddress.Any와, 동기화할 포트를 파라미터로 전달해서 TcpListener의 인스턴스를 생성해서 서버를 만든다.
여기서 IPAddress.Any는 모든 네트워크 인터페이스에서 들어오는 연결을 수신함을 뜻한다.
| 이더넷 인터페이스 : 이것은 컴퓨터와 서버에서 볼 수 있는 일반적인 유형의 네트워크 인터페이스. 이더넷 케이블을 사용하여 장치를 LAN(Local Area Network) 또는 WAN(Wide Area Network)에 연결. Wi-Fi 인터페이스 : 장치와 네트워크 간의 무선 통신. 루프백 인터페이스 : 일반적으로 IP 주소 127.0.0.1로 표시되는 루프백 인터페이스는 장치가 자체적으로 통신할 수 있도록 하는 가상 네트워크 인터페이스. 테스트 및 진단 목적으로 자주 사용. VPN(가상 사설망) 인터페이스 : 장치가 VPN 연결을 설정하면 VPN 터널을 위한 가상 네트워크 인터페이스가 생성. 이 인터페이스는 장치와 VPN 서버 간에 암호화된 트래픽을 라우팅하는 데 사용. |
우리가 사용할 방식은 루프백 인터페이스 방식이다. (자세한 설명은 파이썬 코드에서 후술할 예정이다.)
AcceptTcpClient()는 클라이언트 연결이 수신되면 TcpClient를 반환한다.
별도의 메서드(Connection())를 만들어서 while문을 통해 실시간으로 데이터를 주고받을수있게 세팅한다.
    Vector3 position = Vector3.zero;
    void Connection()
    {
        // Read data from the network stream
        NetworkStream nwStream = client.GetStream();
        byte[] buffer = new byte[client.ReceiveBufferSize];
        int bytesRead = nwStream.Read(buffer, 0, client.ReceiveBufferSize);

        // Decode the bytes int a string
        string dataReceived = Encoding.UTF8.GetString(buffer, 0, bytesRead);

        // Make sure we're not getting an empty string
        // dataReceived.Trim();

        if (dataReceived != null && dataReceived != "")
        {
            // Convert the received string of data to the format we are using
            position = ParseData(dataReceived);
            nwStream.Write(buffer, 0, bytesRead);
        }
}Connection()은 클라이언트와 네트워크 연결을 처리하기 위한 로직을 정의하는 메서드며, 클라이언트로부터 지속적으로 데이터를 수신하기 위해 while문에서 호출된다.
NetworkStream은 클라이언트에서 얻은 바이트스트림타입의 데이터를 읽고 쓰는데 사용된다.
| 스트림은 순차적으로 읽거나 쓸 수 있는 데이터 흐름을 나타내기 때문에 "스트림"이라고 부른다. "스트림"이라는 용어는 실제 스트림 또는 흐르는 물의 개념에서 차용한 것. 프로그래밍 맥락에서 스트림은 소스에서 데이터를 읽든(입력 스트림) 대상에 데이터를 쓰든(출력 스트림) 데이터의 연속 흐름을 처리하는 방법을 제공. 이를 통해 프로그래머는 물리적 스트림에서 데이터를 읽거나 쓰는 것과 유사하게 순차적인 방식으로 데이터와 상호 작용할 수 있다. 스트림의 개념은 데이터의 소스 또는 대상에 관계없이 입력/출력 작업을 효율적이고 균일하게 처리하기 위해 다양한 프로그래밍 언어 및 프레임워크에서 사용된다. 스트림은 파일, 네트워크 연결, 메모리 버퍼 또는 사용자 입력 / 출력과 같은 다양한 소스에서 데이터를 읽거나 쓰는 데 사용할 수 있다. "스트림"이라는 용어는 데이터가 개별 청크가 아닌 연속적인 흐름으로 액세스되거나 조작될 수 있다는 생각을 강조. 광범위한 프로그래밍 시나리오에서 데이터 전송, 처리 및 저장을 처리하는 일관되고 편리한 방법을 제공한다. |
buffer는 수신된 스트림 데이터를 임시로 저장하는데 사용되는 바이트 배열이다. cleint.ReceiveBufferSize를 통해서 바이트수를 확인할 수 있다.
dataReceived에 UTF-8인코딩을 사용하여 수신된 바이트를 문자열로 변환시켜서 할당한다. (수신된 스트링에는 파이썬에서 입력된 좌표값이 들어갈것이다.)
    public static Vector3 ParseData(string dataString)
    {
        // Remove the parenthes
        if (dataString.StartsWith("(") && dataString.EndsWith(")"))
        {
            dataString = dataString.Substring(1, dataString.Length - 2);
            Debug.Log(dataString);
        }

        // Split the elements into an array
        string[] stringArray = dataString.Split(',');

        // Store as a Vector3
        Vector3 result = new Vector3(
            float.Parse(stringArray[0]),
            float.Parse(stringArray[1]),
            float.Parse(stringArray[2]));

        return result;
    }

    private void Update()
    {
        // Set this Object's position in the scene according to the position received
        transform.position = position;
    }
좌표값을 파싱처리하는 메서드다. 스트링값을 파라미터로 받고, 불필요한 괄호들을 제거해주고 실시간으로 Vector3값을 받고 위치값을 업데이트 시켜준다.
using System.Net;
using System.Net.Sockets;
using System.Text;
using UnityEngine;
using System.Threading;

public class MyListener : MonoBehaviour
{
    Thread thread;
    public int connectionPort = 25001;
    TcpListener server;
    TcpClient client;
    bool running;

    private void Start()
    {
        // Receive on a separate thread so Unity doesn't freeze waiting for data
        ThreadStart ts = new ThreadStart(GetData);
        thread = new Thread(ts);
        thread.Start();
    }

    void GetData()
    {
        // Create the server
        server = new TcpListener(IPAddress.Any, connectionPort);
        server.Start();

        // Create a Clinent to get the data stream
        client = server.AcceptTcpClient();

        // Start listening
        running = true;
        while(running)
        {
            Connection();
        }
        server.Stop();
        Debug.Log("서버 스탑");
    }

    // Position is the data being received in this example
    Vector3 position = Vector3.zero;
    void Connection()
    {
        // Read data from the network stream
        NetworkStream nwStream = client.GetStream();
        byte[] buffer = new byte[client.ReceiveBufferSize];
        int bytesRead = nwStream.Read(buffer, 0, client.ReceiveBufferSize);

        // Decode the bytes int a string
        string dataReceived = Encoding.UTF8.GetString(buffer, 0, bytesRead);

        // Make sure we're not getting an empty string
        // dataReceived.Trim();

        if (dataReceived != null && dataReceived != "")
        {
            // Convert the received string of data to the format we are using
            position = ParseData(dataReceived);
            nwStream.Write(buffer, 0, bytesRead);
        }
    }

    public static Vector3 ParseData(string dataString)
    {
        // Remove the parenthes
        if (dataString.StartsWith("(") && dataString.EndsWith(")"))
        {
            dataString = dataString.Substring(1, dataString.Length - 2);
            Debug.Log(dataString);
        }

        // Split the elements into an array
        string[] stringArray = dataString.Split(',');

        // Store as a Vector3
        Vector3 result = new Vector3(
            float.Parse(stringArray[0]),
            float.Parse(stringArray[1]),
            float.Parse(stringArray[2]));

        return result;
    }

    private void Update()
    {
        // Set this Object's position in the scene according to the position received
        transform.position = position;
    }
}
여기까지 유니티 전체 코드다. 이제 파이썬으로 넘어가보자.
아래는 1초마다 3차원상의 z값을 1씩 증가시켜서 유니티로 전송시키는 파이썬 코드다.
import socket
import time

host = "127.0.0.1"
port = 25001

x = 0
y = 0
z = 0

def join_string(x, y, z):
    return f"{x},{y},{z}"

try:
    sock = socket.socket(socket.AF_INET, socket.SOCK_STREAM)
    sock.connect((host, port))

    while True:
        try:
            z += 1
            data = join_string(x, y, z)

            sock.sendall(data.encode("utf-8"))

            response = sock.recv(1024).decode("utf-8")
            print(response)

        except ConnectionResetError:
            print("The server disconnected.")
            # Add any necessary handling for the server disconnection here

        except Exception as e:
            print("An error occurred:", e)

        time.sleep(1)

except ConnectionRefusedError:
    print("Connection refused. Make sure the server is running.")

except Exception as e:
    print("An error occurred:", e)

finally:
    sock.close()
먼저 socket라이브러리를 pip 인스톨러를 통해서 다운받아서 불러온다.
루프백 인터페이스 방식으로 통신처리하기위해 host를 127.0.0.1로 설정하고, 서버에 접속하기 위해 포트번호를 유니티와 동일한 25001로 설정한다.
join_string : 3차원 자표값을 int타입을 파라미터로 받아서 string타입으로 리턴시켜주는 역할을 한다.
sock : IPv4의 주소계열(AF_INET)을 지정하여 스트림 지향 통신을 위해 생성된 TCP소켓이다.
추가로 서버에 연결을 하기 위해서 host,와 port넘버를 파라미터로 전달해야하는데, sock.connect를 사용해서 서버에 연결을 할수 있다.
while문 안을 살표보자.
스트링 타입으로 반환된 data를 인코딩과정을 거쳐서 sock.sendall의 파라미터로 전달한다. 아래 sock.recv를 통해 데이터통신을 확인할 수 도있다.
유니티와 파이썬을 순차적으로 실행시키면 큐브가 서서히 전진하는것을 확인할 수 있다.
'Programming > C# | Unity' 카테고리의 다른 글
| [C#] Unity & Photon을 활용한 서버구축 (0) | 2022.09.13 |
|---|---|
| [그래픽스] 렌더링 파이프라인 (0) | 2022.09.08 |
| [Unity] 1인칭 마우스 입력 / 카메라 회전 & Zoom 기능 구현하기. (0) | 2022.08.15 |
| [Unity] 상속 & 인터페이스 총 정리 (0) | 2022.08.14 |
| [Unity] 델리게이트(Dlegate) & 이벤트(Event) 쉽게 접근하기. (1) | 2022.08.13 |